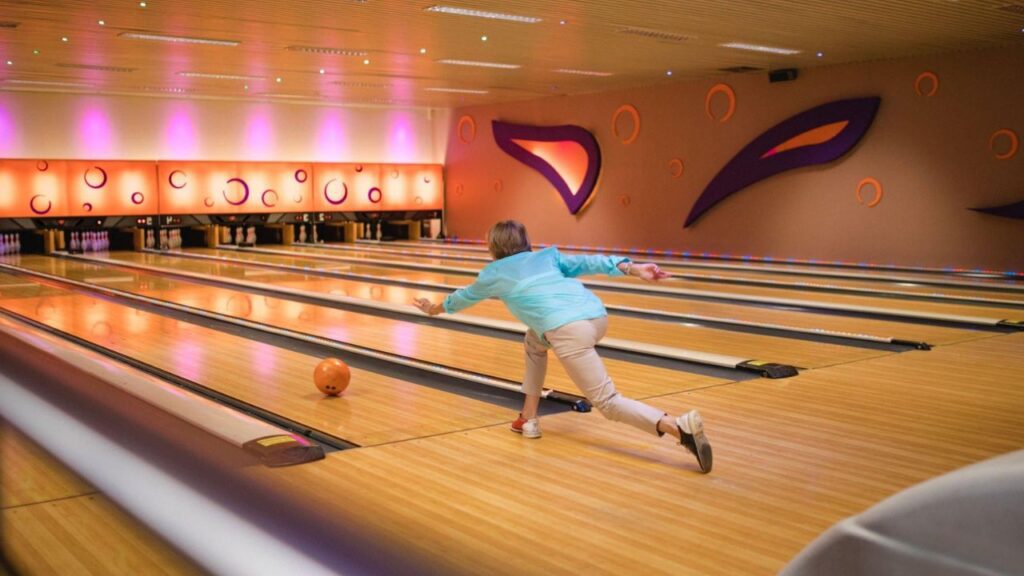
The straight throw is probably the most suggest bowling style for beginners. This style is comparatively easy and ensures a good score, and that does not mean advanced bowlers do not use this style. It is a staple for bowling, whether amateurs or professionals. Where amateurs can learn this style to learn control and precision, professionals use this style for strikes or hitting spares. Therefore, any bowler must increase their expertise in throwing a bowling ball straight.

Choose the Right Ball
Bowling ball manufacturers make balls keeping several factors in mind. Some balls are made in a certain way that they perform best for crackers, some for tweeners. Therefore, if you are willing to shoot the ball straight, you must go for a bowling ball that is meant to roll straight on the lane. In order to strike, you will need to find a ball that has a lower hooking potential. Balls that are on the heavier side tend to roll straight. The heavier you can pull off, the better in case of a straight throw. It is best to have cover stock that is less aggressive as it will react less to oil. However, you can go for little aggressive ones for heavy oil lanes. Pearl reactive or hybrid cover stock works incredibly well for straight throws. In the case of cores, symmetrical cores are highly recommended. Also, as we have mentioned earlier, the heavier the core, the better. A heavier ball will take more power and roll slowly, resulting in a straight motion toward the pocket. Fortunately, most house balls are great for strikes. So, if you don’t own a fancy ball, you can still work on your straight throws using house balls.
The technique of throwing a bowling ball straight
Once you have the most suitable bowling ball for a straight throw, you can get into the technical part of successfully throwing it. You might need some practice to ace the throw. However, this is the easiest style among all the styles. It is also a notable factor that most beginners start bowling with strokes.
A. Find the right grip
Getting the grip right is essential for straight bowling. There are two types of grips that you can use. One is a conventional grip, and the other is a fingertip grip. The bowlers sink their entire finger in the drill holes in the conventional grip. On the contrary, in the fingertip grip, the bowler uses the tips of their finger to hold the ball and throw it. Both styles can be used according to your preference. However, using a fingertip grip is better as it allows more flexibility. Throwing the ball is also comparatively easy in fingertip grip. However, some bowlers find it difficult as fingertip grip tends to be more suitable for spinning the ball. In that case, you can try a conventional grip sinking both your middle finger entirely in the ball. Remember that, no matter which grip you are using, it is best not to move your wrist much while keeping the hand behind the ball. The wrist should be in a stable position while the hand will move forward during the throw.
B. Choose the starting position
Bowling is pretty much about finding what works best for you. It is true for starting positions as well. You can start in two ways. You have to find out which one works better for you and get the desired result. Firstly, you can throw the ball from right behind the foul line. Without any movement, you can throw your ball using the motion of your hands. In this starting position, you will need to keep your feet apart from each other—approximately 4 inches. Secondly, you can start off a little back from the foul line. Then you need to stride two or three steps to reach right behind the foul line and throw the ball. Taking a few steps provides momentum for throwing the ball. Hence, this position is preferable. However, in some alleys, you might find that there is not much room for strides. In that case, you need to take smaller steps before throwing the bowling ball. Nonetheless, you should never touch the foul line. If you do, the score will be reset if it is the first throw. For the second throw, the throw will be counted as a miss.
C. Ensure proper foot-hand alignment
Foot and hand alignment is very important to ensure a strike. Throwing the ball is not just about hand movement but also about correct foot positioning too. While your hand is doing the throwing job, your feet work on balancing and optimizing force for the perfect throw. While throwing, your dominant foot plays a major role. Your dominant foot will be the foot opposite of your dominant hand. If case you stride, you need to make sure you stop behind the foul line when your dominant foot is forward and pointing forward. You need to hold the position while you strike, but you can adjust your alignment depending on your natural motion tendencies. Keep in mind that your torso will be parallel to your dominant feet while you swing your hand forward and throw the ball. No matter what, it is best to stay in the middle of the lane.
D. Aim for pocket
Once you have your position sorted, you need to focus on your desire. Most people often misunderstand that you should aim for the midpoint. However, you can also throw straight for the right or left side. You’ll be able to keep aiming and hitting the target with practice. Before all, make sure your aim for pocket and don’t miss gaining score.
Further Improvements
So far, we’ve discussed how to throw a bowling ball straight. No matter how religiously you follow the instructions, you will face some errors. With practice, you will gain the skill to improve yourself. The key is to learn from your mistakes and learn from them.
I. Aim
Although, the aim is to shoot for the pocket. However, you will understand the room for improvement in aim with practice. Like we said before, some prefer hitting the middle, whereas others prefer hitting the sides. Which one works better for you, that you will learn with time. Furthermore, you might need to aim differently in the pocket in different scenarios.
II. Grip
The grip is also something that works differently for different bowlers. Earlier, we mentioned that a fingertip grip is better for straight throws. However, a conventional grip may work better for you. Therefore, keep an open mind and try different grips.
III. Speed
In order to secure strikes, you need to understand your speed as well. Speeding up a little by taking a few steps creates momentum and force to throw the ball. Then again, your hand movement also influences the speed and motion of the bowling ball. Once you start throwing, you will learn how forcefully you are throwing the ball and at what speed. You can determine whether you need to slow down a little or add more speed based on the outcome.
IV. Curve
You need to ensure that it is not going in the gutter when you are throwing a bowling ball. Therefore aiming is important. In the earlier stages, there could be times when you are aiming for a straight throw, but the ball rolls sideways and ends up in the gutter. From such throws, you need to understand the curve of the balls. Why your ball is making a curve and how you can fix it. This could happen due to poor hand motion or grip. You need to improve your hand movement for a straight throw.
Things should remember
- Take a similar number of move-in each time, whether it’s 4, 5, or 6, whatever you feel comfort. This will help you get into a new style and gain consistency with your throws. Which will give you absolute success.
- Your closing step should be on the foot opposite the bowling hand.
- The downswing should not be forced. Hit the top of your backswing to accelerate and lift it
- Look for your mark all time (the same arrow) and adjust your starting point left or right as you need.
To Sum p
Always keep in mind a perfect practice makes a man perfect, and there is no denial of that, likewise, for bowling too. If you die practicing but not in the right way, then it is valueless. So practice and practice perfectly. With perfect practice, you can get so much control that you can throw your ball in any way you want. So, the key is to practice no matter which style you choose to learn.
